The application Web terminal gives you command-line access to the container your application’s web process is running in. You can use the web terminal to run scripts and read files. This is useful for debugging issues, performance monitoring, or manually executing scripts ad-hoc.
Currently, the only process you can access through the web terminal is the web process. Background processes or cron jobs are not available in the web terminal.
Web Terminal With a Dockerfile
If your application is created with a Dockerfile, make sure Bash is installed in the container. In most cases, the base image (e.g. Ubuntu) includes a shell package and will work by default. In some more streamlined containers, the shell package may not be included, and you’ll need to add it. The base image determines how to add the shell package:
- Alpine:
apk add bash - Ubuntu/Debian:
apt install bash - Fedora:
dnf install bash
Set Up Authentication
To access the web terminal, you’ll need to:
- Have at least one successful deployment of the application.
- Have a healthy application that is running. If there are any errors or the application is stopped, the web terminal will not be available.
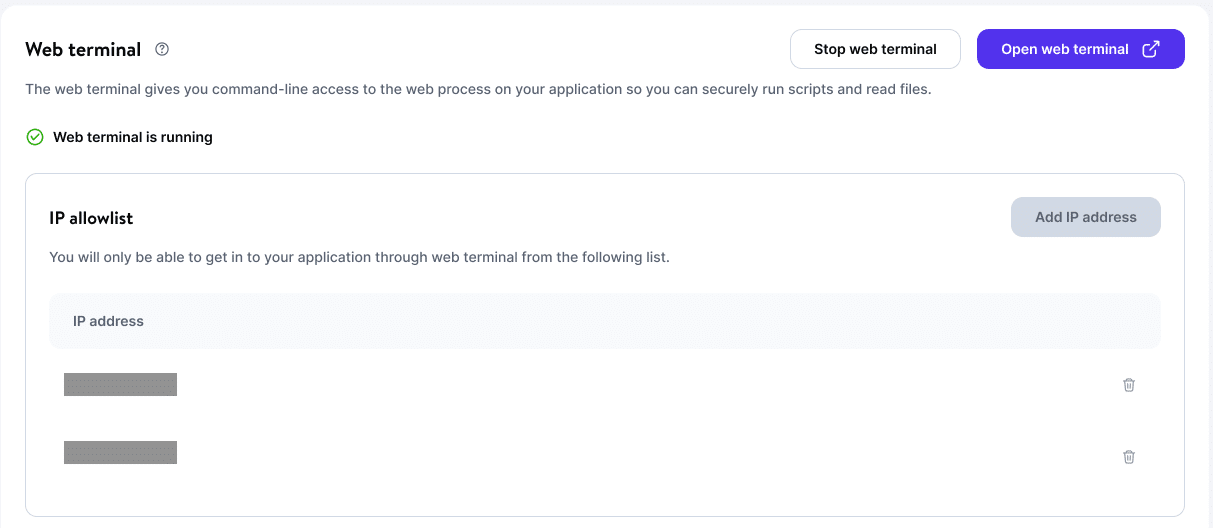
- Add at least one valid IP address to the allowlist.
IP addresses added to the allowlist must be unique. If you try to add an IP address that is already in the allowlist, you’ll receive an error and will not be able to add the duplicate IP address.
Add IP Address
The first time you go to the Web terminal page for your application in MyKinsta, click Set up authentication to add IP addresses to the allowlist. To see the address you’re connecting from, use a tool like Test your IPv6.
Enter the first IP address you want to allow. To add more IP addresses, click Add another. Once you have entered all the IP addresses you want to allow, click Set up authentication.

If you need to add more IP addresses in the future, click Add IP address in the allowlist section of the Web terminal page.
Delete an IP Address
To remove an IP address from the allowlist, click the Delete (trash can) icon next to the IP address you want to remove and click Delete IP address to confirm the deletion.
Start and Open Web Terminal
To open the web terminal, you first need to connect to it, which deploys a web terminal pod. Click Start web terminal to begin opening the connection. While the connection is opening, options on the Web terminal page will be disabled.

Once the deployment of the web terminal pod is complete, Web terminal is running appears above the allowlist. Click Open web terminal to open the web terminal in a new tab in your browser.
You may see a Starting web terminal page while the terminal is loading. Once the terminal loads, you can run commands like a regular terminal. The commands available to you will depend on the executables present in your application.
Terminal Username
If your application was created with a buildpack (Set up container image automatically in the Build environment step), the username in the terminal may be “heroku.” Kinsta uses buildpacks, an open-source project maintained by Heroku, to automatically determine and create a container for your application based on your repository, and this carries over into the web terminal.
If your application was created with a Dockerfile (Use Dockerfile to set up container image in the Build environment step), the username in the terminal will usually be “root”, but it depends on how your Dockerfile is set up.
Stop and Close Web Terminal
When you are finished working in the terminal, close the tab in your browser to close the connection to the web terminal. Closing the tab does not currently stop the terminal, but if you want to open the terminal again, you’ll need to click Open web terminal, wait about 30 seconds, and refresh the new tab to see the terminal again.
To stop the web terminal, click Stop web terminal.
While the terminal is running, you cannot edit the IP allowlist. If you need to edit it, stop the terminal, make your changes to the allowlist, and open the terminal again.
If the web terminal connection is created but not opened, the connection will automatically shut down after 24 hours.
Troubleshooting
- When opening the web terminal, if you see an Error 1016 – Origin DNS page instead of the terminal screen, this is due to a slight delay in DNS propagation. Wait 1 minute and refresh the page until you see the terminal screen. If the issue persists beyond a few minutes, contact our Support team.
- If you see a 403: Forbidden error when you open the web terminal, this means your IP address is not in the allowlist. Stop the web terminal, add your IP address, and start the web terminal again.
- An error similar to the following ERRO[0000] exec failed error indicates the container is missing the shell package. You’ll need to add that package to your container in order to run the web terminal.
ERRO[0000] exec failed: container_linux.go:425: starting container process caused: exec: “bash”: executable file not found in $PATH
command terminated with exit code 1